A garage full of scattered drills, saws, and sanders is a safety hazard and a recipe for damaged equipment. Proper power tool storage protects your investment, keeps your workspace safe, and makes projects run smoother. Whether someone owns a handful of essential tools or a full workshop setup, how to organize power tools in garage, and where to store them, makes a real difference. This guide walks through practical strategies for protecting tools from the elements, organizing them for quick access, and setting up a garage storage system that actually works for how work gets done.
Table of Contents
ToggleKey Takeaways
- Store power tools in a dry, climate-controlled location like a garage corner or interior closet, elevated 6–12 inches off concrete floors to prevent moisture damage.
- Maintain ideal storage conditions between 50°F and 85°F with humidity under 50%, using dehumidifiers or desiccant packs in sealed tool boxes to protect motors and batteries.
- Invest in proper storage solutions such as metal tool chests, wall-mounted cabinets, or pegboard systems to keep tools organized, accessible, and safe from dust and damage.
- Organize power tools by frequency of use—daily tools at waist height, monthly tools at eye level, and occasional tools on higher shelves—and label everything clearly to save time.
- Store lithium-ion batteries at 40–60% charge in cool, dry conditions and keep cords loosely coiled away from heat sources to maximize lifespan and prevent safety hazards.
- Clean tool exteriors, vents, and cords monthly, inspect for damage, and replace dull saw blades promptly to maintain performance and extend equipment life.
Choose the Right Storage Location
The first decision is where, not just how, to store power tools. A basement, climate-controlled garage, or interior closet beats an uninsulated shed or outdoor storage. Tools left in garages that swing between freezing winters and hot summers suffer faster. Moisture and temperature swings damage motor windings, corrode metal parts, and degrade battery cells.
If a garage is the only option, pick the driest corner, typically higher up on a wall, away from exterior doors and water sources. Never store tools on concrete floors directly: moisture wicks upward. A wooden shelf or pallet lifts tools 6 to 12 inches off the ground, creating airflow underneath.
Temperature and Humidity Control
Ideal storage sits between 50°F and 85°F with humidity under 50%. Many DIYers don’t have climate control, so use secondary tactics. A small dehumidifier or a moisture-absorbing desiccant pack (available cheaply in bulk) works in sealed tool boxes. Replace or recharge desiccant every few months, especially in humid climates.
In winter, avoid bringing a cold tool directly into heated air to work on it: condensation forms inside the motor. Let it sit indoors for 15–20 minutes first. Never store lithium-ion batteries in freezing conditions, the cold temporarily reduces capacity and can damage the pack permanently if stored below 32°F for extended periods.
Invest in Quality Storage Solutions
Throwing tools into a cardboard box leads to damage, lost accessories, and frustration. A modest investment in the right storage setup pays off in durability and efficiency.
Tool Chests, Wall Mounts, and Pegboards
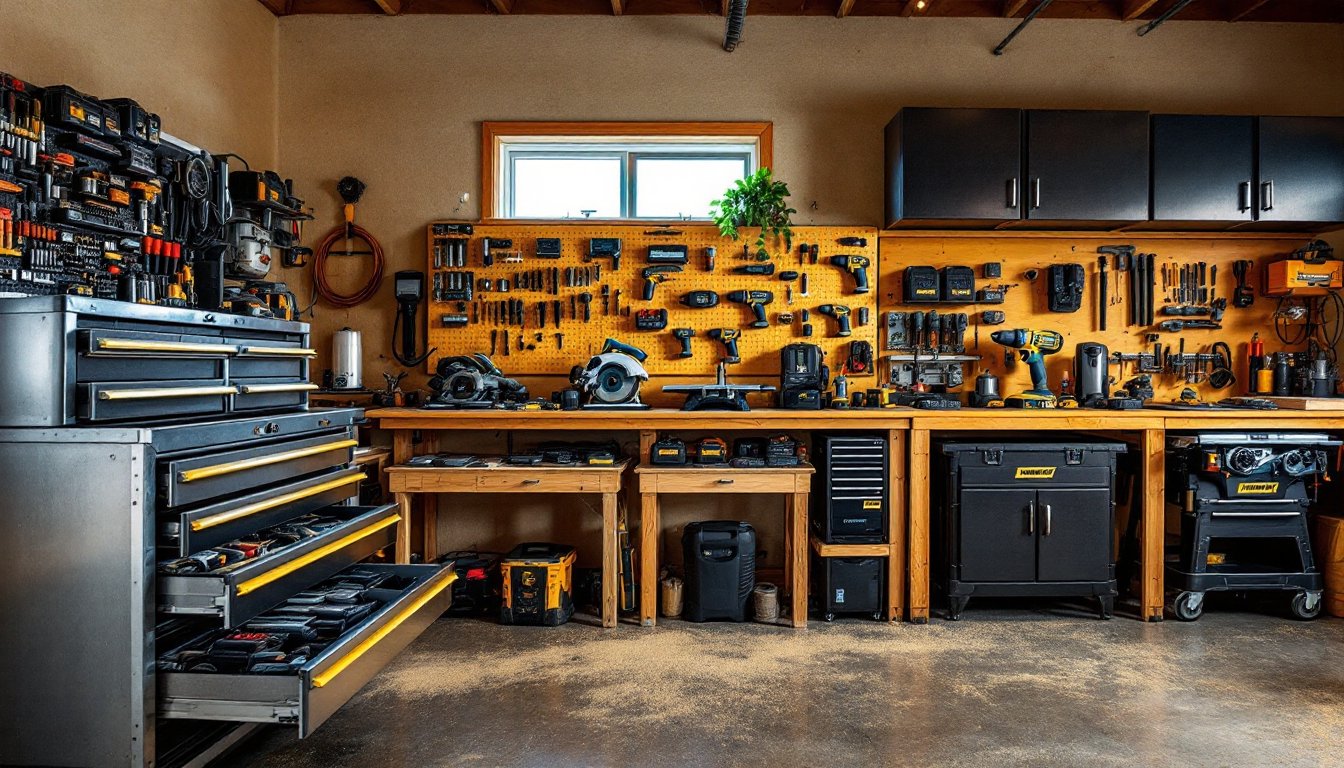
Metal or plastic tool chests (ranging from $50 to $300+) keep tools dust-free and organized. Look for one with multiple drawers so smaller items, bits, blades, chuck keys, stay separate and findable. Chest depth should match tool size: an 18-inch-deep chest works for most cordless drills and impact drivers, but a 24-inch depth accommodates larger sanders or circular saws.
Wall-mounted cabinets or steel storage boxes are ideal for garages where floor space is tight. Lockable models offer security if kids or guests share the garage. Cost runs $100–$500 depending on size and material.
Pegboards are popular for organizing hand tools and small power tools. Drill holes 16 inches apart (standard stud spacing) into wall studs, not just drywall, power tool weight exceeds what drywall anchors handle safely. Use 1/4-inch plywood backing behind the pegboard for better hook holding strength. Pegboards work best for tools under 5 pounds: heavier items need dedicated shelving or magnetic strips.
Wall-mounted power strips let tools charge and stay accessible without cords snaking across the floor. Mount the strip 48–54 inches high for ergonomic reach and better visibility. Label which tool charges in which outlet to avoid confusion and overloads.
Keep Your Tools Clean and Maintained
Dust, moisture, and sawdust buildup reduce tool lifespan and performance. A five-minute cleaning routine after each use beats a heavy cleanup later.
Wipe down tool exteriors with a dry microfiber cloth to remove dust and light moisture. Pay attention to motor vents and air intakes: clogged vents cause overheating. Use a small soft-bristle brush (old toothbrush works fine) to dislodge sawdust from crevices and trigger mechanisms. Avoid high-pressure air blowers near electronic components: they force debris deeper into seals.
For metal surfaces, a light machine oil or anti-corrosion spray prevents rust. Spray lightly onto a cloth, then wipe the tool: don’t saturate it. Chuck keys and drill bits also benefit from a thin oil coat.
Inspect cords and plugs visually for cracks or burn marks monthly. A damaged cord poses shock and fire risks, replace it rather than repair it. Check chuck tightness on drill presses and chuck wobble on cordless drills: a loose chuck causes bit runout and inaccurate work.
Store saw blades vertically in a dedicated rack or blade cabinet, not loose in drawers where they dull and cause cuts. Dull blades increase heat and strain on motors. Sharpen or replace blades when crosscuts start burning or splintering.
Organize by Frequency of Use
The tools someone reaches for every week shouldn’t live in the back corner of a high shelf. Smart organization saves time and reduces frustration.
Group tools into three tiers: daily/weekly use, monthly use, and occasional/seasonal use. Daily-use tools (cordless drill, circular saw, power sander) go on open shelves, pegboards, or the top drawer of a chest at waist height. Monthly-use tools (miter saw, table saw for specific projects, specialty sanders) sit on stable shelves just below or above eye level. Occasional tools (floor sander, tile cutter, masonry bits) go on higher shelves or in the back, they’re lighter to grab once in a while but need secure placement.
Label shelves and drawers clearly with a label maker or permanent marker. “Drill Bits,” “Saw Blades,” “Sanding Pads” save hunting time. Use clear plastic drawer dividers or small bins inside tool chests to prevent mixing and shifting during transport.
Keep a simple inventory. Jot down which tools you own and where they live. A quick photo on a phone or printed list on the garage wall helps anyone else, a family member or contractor, find what they need without disturbing the system.
Protect Batteries and Power Cords
Batteries and cords fail faster than the tools they power. Proper storage extends their life significantly.
Lithium-ion batteries (the standard in modern cordless tools) degrade if stored fully charged or completely depleted. Store them at 40–60% charge in a cool, dry spot. Most chargers have a “storage” mode that cycles batteries to this level automatically: consult the manual. If left uncharged for months, top them up briefly every three months to prevent self-discharge damage.
Keep batteries away from metal shavings, nails, or conductive material that could cause a short circuit. A small plastic battery storage case (often sold as part of a tool set or separately for $15–$40) isolates them safely. Never store a damaged battery: a swollen or cracked battery pack is a fire risk, dispose of it at a recycling center.
Power cords deteriorate in heat and cold. Coil them loosely (not tightly) to avoid pinching the insulation. Tight coils create stress points that crack. Store cords in a designated bin or hang them on a wall hook, away from sharp edges and heat sources like furnaces or water heaters.
Inspect plugs monthly for corrosion or bent pins. Clean lightly with a dry cloth or pencil eraser if dust accumulates. A corroded plug reduces electrical contact and increases shock risk.